

How to reclaim space after upgrading to Windows 11
When you upgrade to Windows xi from Windows ten or another version, the setup makes a copy of the previous installation as part of the procedure, in instance something wrong happens during the installation, and the organisation needs to gyre back to the original setup, or Windows 11 is having compatibility issues, and you demand to revert to a previous version manually.
Although the safeguard feature provides a way to restore the original changes, the copy of the files will exist kept fifty-fifty after the upgrade completes successfully, taking a lot of storage (within the "Windows.old" binder) that can be an issue for devices with limited capacity.
If you notice that your laptop or desktop figurer is running out of space after the upgrade, Windows 11 includes an pick to delete the previous files that can reclaim 12GB or more, depending on the previous configuration.
In this Windows eleven guide, we volition walk you through the steps to delete the previous installation files wasting space afterwards upgrading to the new version of the Bone.
- How to free up space after Windows 11 using Settings
- How to gratis up space afterwards Windows 11 using Deejay Cleanup
How to complimentary up space after Windows 11 using Settings
To reclaim space later installing Windows xi, employ these steps:
- Open Settings.
- Click on System.
- Click on Storage.
-
Click the Temporary files page on the right-side.
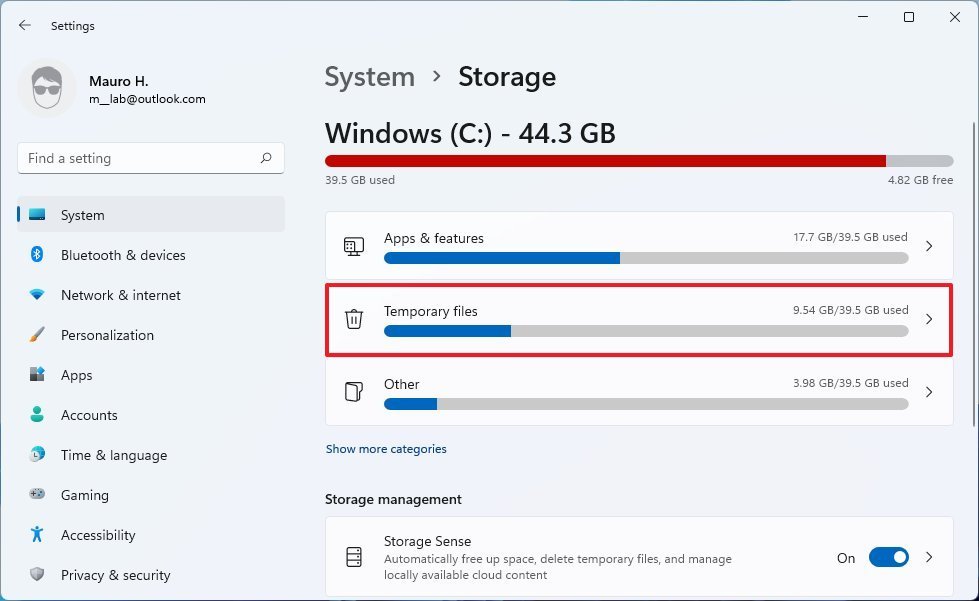 Source: Windows Primal
 - Clear all the preselected items (if applicable).
-
Check the Previous Windows installation(due south) selection.
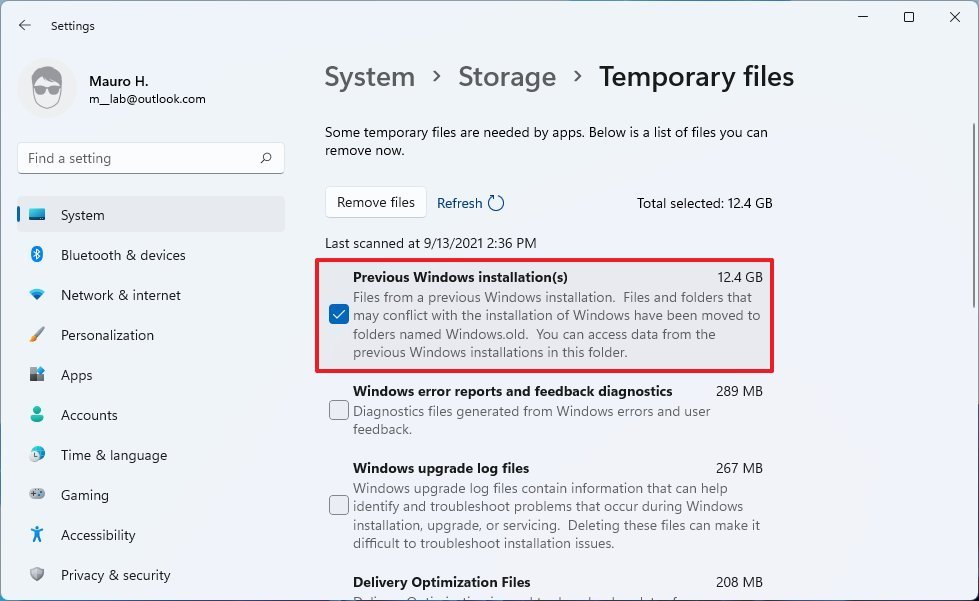 Source: Windows Central
 - Click the Remove files button.


Once y'all complete the steps, the previous installation files will exist removed alongside any other temporary files you lot may take selected on the settings folio.
In previous versions, the option was besides available through the Storage settings, but it's no longer the case with Windows 11.
How to free up infinite after Windows xi using Deejay Cleanup
In addition to using the Settings app, you tin can also use the legacy Disk Cleanup tool to delete the folder with the previous installation of Windows xi.
To free up space after the installation of Windows eleven with Disk Cleanup, use these steps:
- Open up First.
- Search for Disk Cleanup, click the summit issue to open the settings.
-
Click the Clean upward system files button.
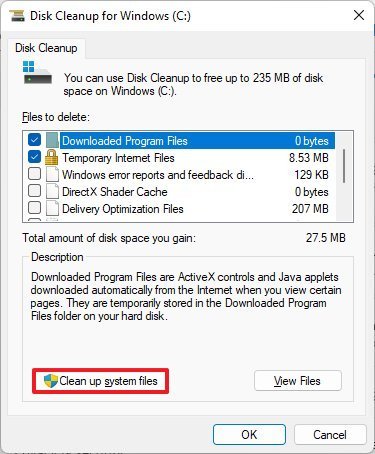 Source: Windows Central
 -
Check the Previous Windows installation(south) option.
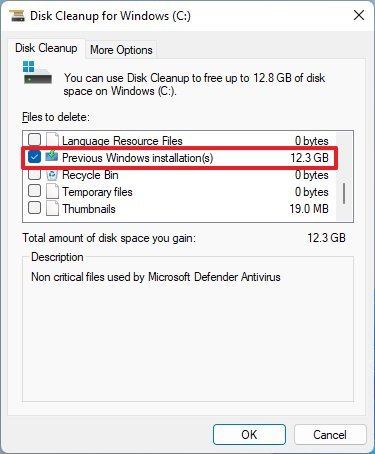 Source: Windows Central
 Quick tip: You tin can also select other temporary files (such equally Commitment Optimization Files and Windows update log files) to recover fifty-fifty more than infinite.
-
Clear the Downloads choice to avoid deleting downloaded files inside the "Downloads" folder.
- Click the OK push.


Later you complete the steps, the folder with the previous installation files will be deleted from your computer, freeing upwardly storage on the principal drive.
The system volition but go along the re-create of the earlier setup for the first 10 days after the upgrade. After this period, Windows 11 will automatically delete these files. Too, later on removing the files, the option to coil back will no longer be available in the Settings app. In the future, if you desire to downgrade, you will have to do a clean installation using the version of Windows you want to use.
More Windows resources
For more helpful articles, coverage, and answers to mutual questions near Windows ten and Windows 11, visit the following resource:
- Windows x on Windows Primal — All you lot need to know
- Windows ten assistance, tips, and tricks
- Windows eleven on Windows Key — All you lot need to know

Source: https://www.windowscentral.com/how-reclaim-space-after-upgrading-windows-11
Posted by: mcelroywitaysen.blogspot.com
0 Response to "How to reclaim space after upgrading to Windows 11"
Post a Comment